
There’s a moment every smart home goes through: the day it stops living in your phone and shows up on the wall. A wall tablet is the difference between a smart home only you can drive and one the whole household actually uses — no unlocking, no app-hunting, just walk up and tap.
I’ve mounted more tablets than I’ll admit to, and I’ve made most of the mistakes for you: the tablet that slept through every command, the one that burned a dashboard ghost into its screen, the charging cable that dangled down the hallway wall for a month (ask my family how popular that was). This is the guide I wish I’d had — hardware, mounting, kiosk mode, and the dashboard itself, in that order.
Heads up: some links below are Amazon affiliate links. If you buy through one, I earn a small commission at no extra cost to you — it doesn’t change what I recommend, and the first option in this guide is still “use the tablet you already own.”
Step 1: Pick the hardware (cheap is the right answer)
Here’s the counterintuitive part: a wall tablet is the one place in your smart home where you should not buy nice things. It runs one app, full screen, forever. What actually matters:
- Size: 8–10 inches. Smaller disappears on a wall; bigger starts looking like a TV in the hallway.
- A screen with decent brightness and viewing angles, because you’ll glance at it from the side far more often than you’ll stand square in front of it.
- Reliable Wi-Fi and a powered USB port. That’s genuinely the whole spec sheet.
Your realistic options, from cheapest up:
- The drawer tablet you already own. That retired iPad or dusty Android tablet is the perfect first wall panel. Cost: zero. Try the idea before you spend a cent on it.
- A budget Android tablet (roughly the $100–150 zone). The sweet spot. Android matters here because the best kiosk software lives there (more in Step 3).
- Amazon Fire tablets. Famously cheap, and they can work — but they fight you: aggressive battery management, no Google services, lockscreen ads to work around. Fine for tinkerers, not the path of least resistance.
Skip the premium tablets. A $600 device showing the same dashboard as a $120 one is just a $480 donation to the idea of nice bezels.
If you are buying: what I’d actually get
Everything here is the cheap-and-boring end of the shelf on purpose — this device runs one app, full screen, forever.
- Budget Android tablet — the Lenovo Tab M9 — the sweet spot, and the reason I say Android: the good kiosk software lives there.
- Bigger screen, still cheap — the Lenovo Tab M11, 11 inches and 400 nits of brightness — worth it only if the tablet lives somewhere people stand back from, like a hallway.
- Amazon Fire tablet — the Fire HD 10 — cheapest way in, and it will fight you (see the caveats above). Buy this one with your eyes open.
One honest aside about my own wall
I should come clean here, because it cuts against the list I just gave you. The main screen in my house isn’t a cheap tablet at all. It’s a Cozyla Calendar Plus 2 — a 24-inch Android panel that is really a family calendar with the Play Store on it, and it cost a good deal more than anything above.
I didn’t buy it to run Home Assistant. I bought it because the “who is picking up who on Thursday” problem needed solving, and because it runs Android it will happily show a dashboard in a browser like any other device. It also came with its own wall mount, which is exactly why you won’t catch me naming a favourite magnetic bracket below — I’ve never needed one for it.
So take the list above for what it honestly is: what I’d buy if a Home Assistant dashboard were the only job. That advice stands. But if you want the screen to earn its keep as the household’s calendar as well, that’s a different purchase at a different price, and I’d rather tell you what I actually did than pretend my wall matches my own recommendation.
Step 2: Mounting and power (the part everyone underestimates)
The tablet is the easy purchase. Getting it on the wall cleanly is where the projects stall.
- Mounting: if I were hanging a tablet today I would start with a magnetic wall mount — the tablet snaps on and off for updates or the occasional couch session. Flush in-wall mounts look incredible but turn a weekend project into drywall surgery. Start magnetic.
- Power: the dangling-cable phase is real, and it ends one of three ways: a cable channel painted to match the wall (easy, looks fine), an outlet relocated behind the tablet (clean, needs an electrician or confidence), or PoE with a splitter if you’re lucky enough to have ethernet in the wall.
- Screen care: two settings save your hardware. Set the screen to dim or sleep when nobody’s around (motion wake fixes the rest — Step 3), and if your dashboard has large static bright areas, use a dark theme. Ghost images of a weather card are a real thing on cheap panels left on 24/7.
- Battery health: a tablet plugged in at 100% forever will bloat its battery eventually. If your kiosk app supports charge limiting, cap it around 80% — your future self says thanks.
Step 3: Kiosk mode done right
A wall tablet without kiosk mode is just a tablet taped to a wall — one accidental swipe and your toddler is in the settings menu. Kiosk mode locks the device to your dashboard: full screen, no header, no sidebar, no exits.
I’ve written a full Kiosk Mode Home Assistant setup guide that walks through this step by step, so I’ll give you the short version here:
- On Android, Fully Kiosk Browser is the gold standard — full-screen lockdown, motion-detection wake using the front camera, scheduled screen off, remote reload. The paid license is a one-time few dollars per device and worth every one of them.
- Hide the Home Assistant header and sidebar with the kiosk-mode frontend integration so the dashboard is all the tablet shows.
- Turn on motion wake. A wall panel that’s awake when you walk up to it feels like magic; one you have to tap awake feels like a broken light switch.
- On an iPad, Guided Access gets you most of the lockdown, minus the fancy extras. It works; it’s just less flexible.
Step 4: Design the dashboard for the wall, not your phone
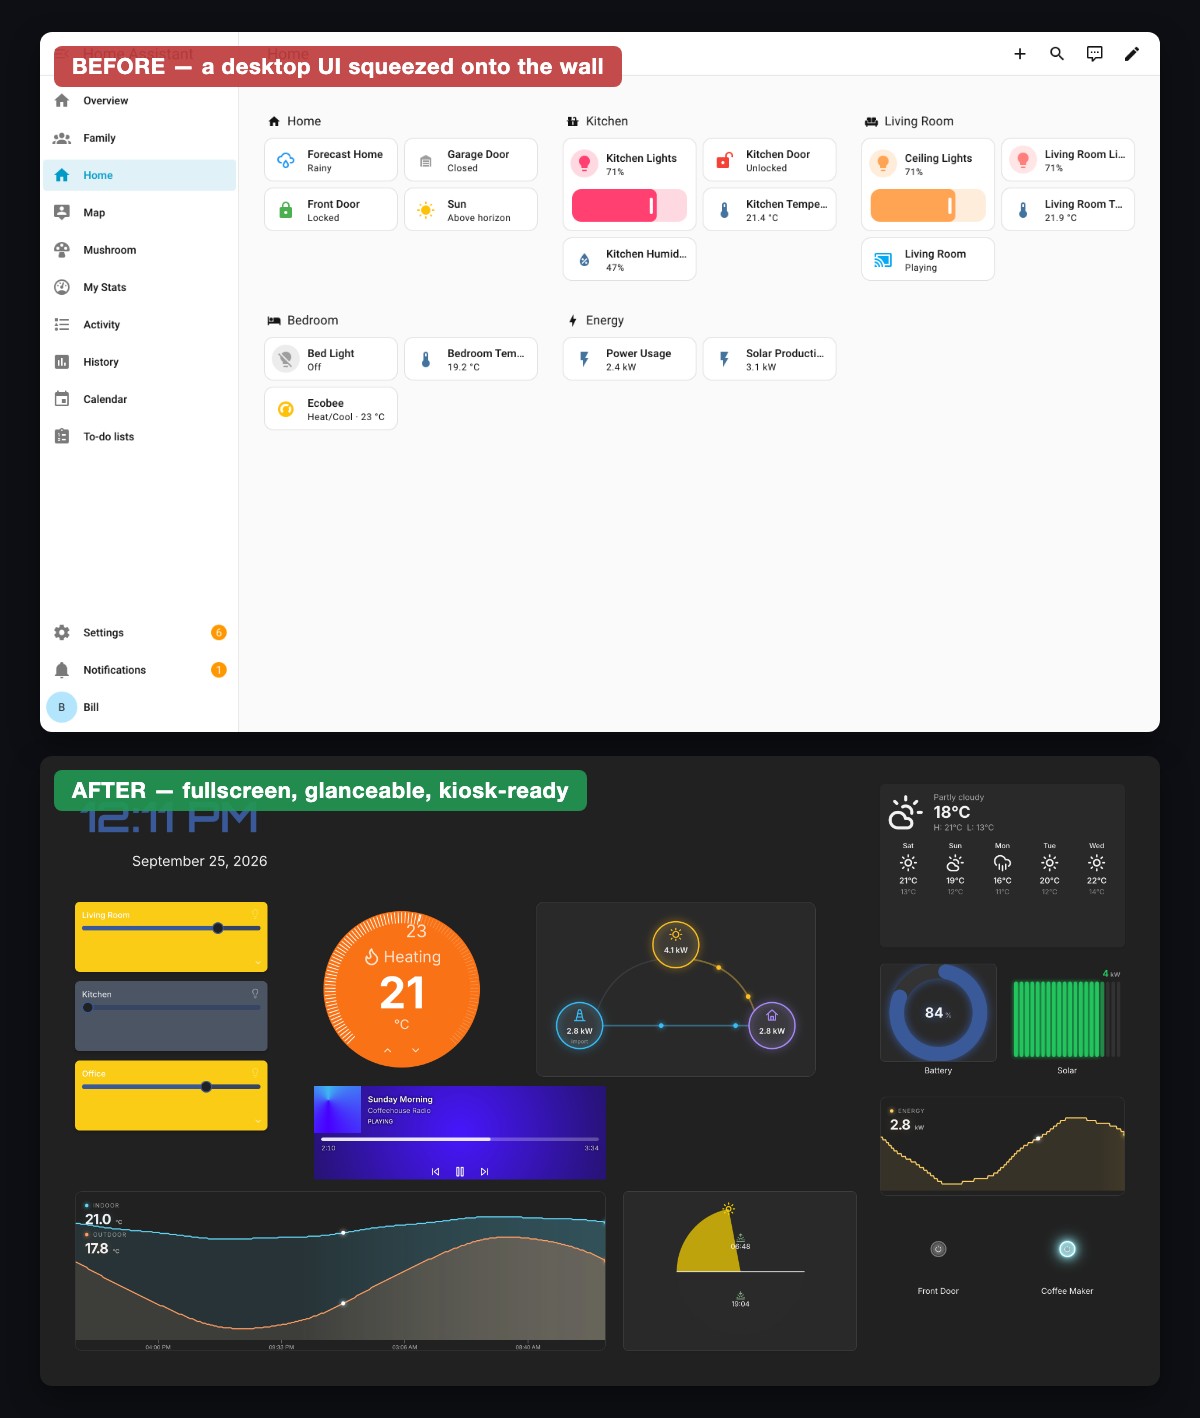
Here’s the mistake I made first: I pointed my wall tablet at my personal dashboard and called it done. Nobody used it. A wall panel has different rules than a phone dashboard:
- It’s a shared screen. Strip out anything only you care about. Automations debug info, network stats, your 3D printer — gone.
- Big targets, high contrast. It gets used at a glance, from an angle, by people who didn’t build it. Buttons should be tappable without aiming.
- Show the answers, not the sensors. “Is the garage shut? Who’s home? What’s the temperature?” — the three questions people actually walk up and ask. Answer those above the fold.
- One screen per location. The kitchen tablet shows kitchen-and-whole-house stuff. It doesn’t need your bedroom lamp.
Step 5: The multi-tablet problem nobody warns you about
One wall tablet is a project. Two or three is a fleet — and every dashboard tweak now means walking tablet to tablet, exiting kiosk mode, refreshing, locking it again. I did the hallway-kitchen-office loop for months. It gets old by roughly the second lap.
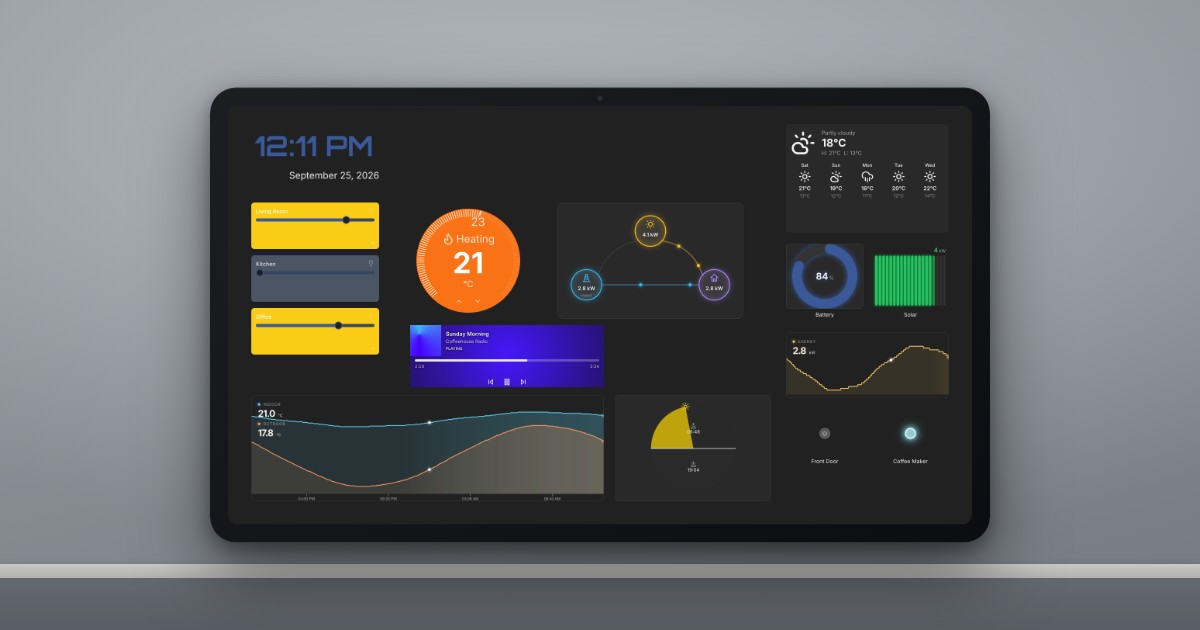
This is the exact problem that pushed me to Dashable, and specifically its remote browser control: every tablet in the house shows up in one editor, and you push updates, switch views, or reload screens from your desk. Change the kitchen dashboard, hit update, and the tablet on the kitchen wall just… changes. No ladder, no lap of the house. The free tools can reload devices one at a time with some setup, but running the whole house’s screens from one place is the part I haven’t found anywhere else.
Troubleshooting the usual suspects
The tablet keeps falling asleep. Disable the OS screen timeout and let your kiosk app own the screen schedule; if it has motion wake, turn it on and set screen-off hours for night.
Someone keeps escaping kiosk mode. Set a kiosk PIN and disable the status-bar pull-down in your kiosk app’s lockdown settings — the top-edge swipe is always the escape hatch.
The dashboard is stale/frozen in the morning. Schedule a nightly page reload in the kiosk app. Cheap tablets and week-long browser sessions are not friends.
Do I need to expose Home Assistant to the internet for this? No — a wall tablet on your home Wi-Fi talks to Home Assistant locally. Remote management tools have their own security models, but the tablet-on-the-wall use case never requires opening your HA to the world.
Put it on the wall
That’s the whole journey: a cheap tablet, a mount that suits your wall, tidy power, Fully Kiosk with motion wake, and a dashboard designed for shared, at-a-glance use. Do those five steps and you’ll have the thing every smart home actually needs — a control panel your household walks up to and uses.
Stop juggling phones and apps for every light switch. Visit dashable.app and build your wall-tablet dashboard free — your first screen is done in an afternoon.