Home automation is a game-changer in modern living, offering not just convenience but also enhancing security and promoting energy efficiency. Among the plethora of platforms enabling this futuristic lifestyle, Home Assistant stands out for its robustness and flexibility. This open-source platform seamlessly integrates a wide range of smart devices, allowing users to automate daily tasks, monitor their homes remotely, and craft routines that fit their lifestyle. However, when it comes to personalizing the Home Assistant dashboards to cater to individual needs and aesthetics across various devices, users often find themselves at a crossroads. This is precisely where Bill, a creative mind in the realm of smart home customization, introduces a groundbreaking approach through his recent tutorial.
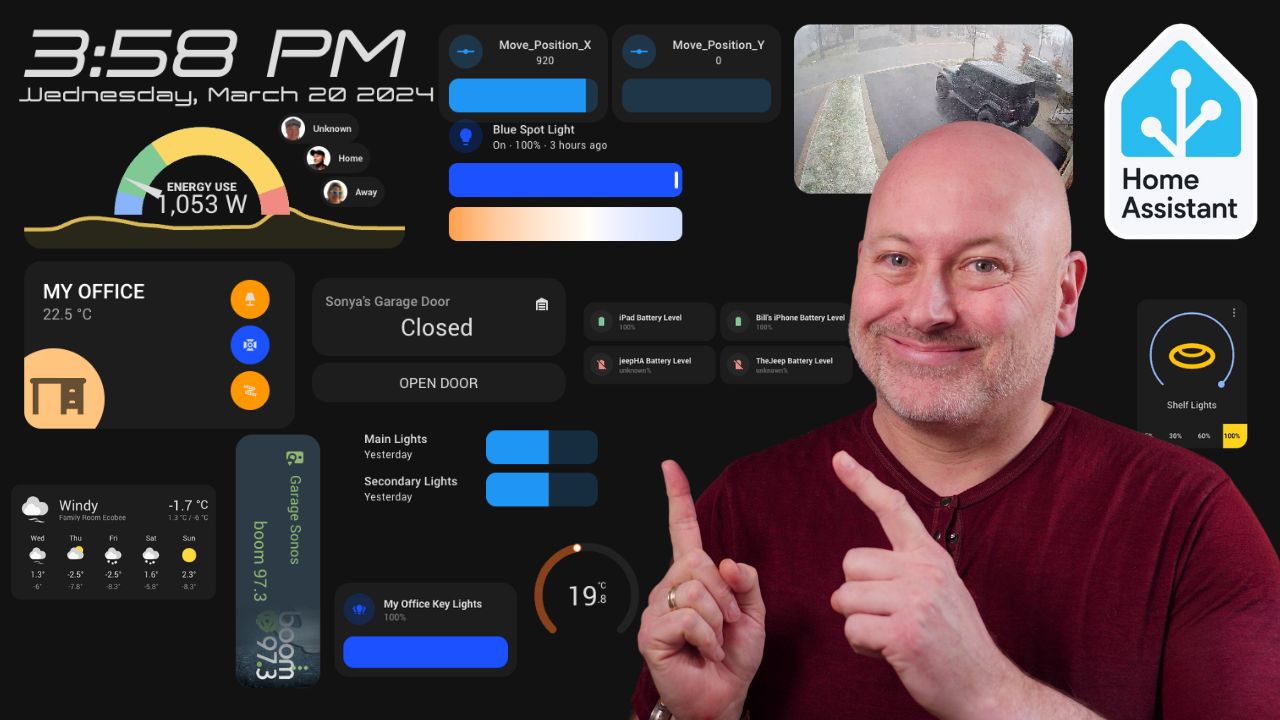
Bill’s innovative strategy breaks away from conventional dashboard layouts that adjust dynamically. His method empowers users to meticulously control the placement and sizing of each dashboard card, including the innovative twist of positioning media cards in any desired orientation. This level of customization is facilitated by two pivotal Home Assistant add-ons: Browser Mod and Button Card. Browser Mod opens up possibilities for applying custom CSS styling to cards, thereby achieving the exact look and feel one desires. Meanwhile, Button Card plays a crucial role in crafting customizable buttons and arranging them with an unparalleled degree of precision.
The tutorial kicks off with a straightforward setup of Home Assistant, followed by an introduction to the Home Assistant Community Store (HACS). With HACS in place, Bill walks viewers through the installation of Browser Mod and Button Card, laying the groundwork for dashboard customization. He then demonstrates how to create a new dashboard, switch its layout to ‘panel’ for a seamless full-screen display, and integrate a ‘button card’ as the base element. This card acts as a versatile foundation for additional cards, offering extensive customization options such as dimensions, color, and exact positioning.
Here is the yaml code used in the video.
type: custom:button-card
show_state: false
tap_action:
  action: none
custom_fields:
  movement_slider:
    card:
      type: tile
      entity: input_number.movement_value
      features:
        - style: slider
          type: numeric-input
  wled_current:
    card:
      type: gauge
      entity: sensor.wled_estimated_current
  test_light:
    card:
      show_name: true
      show_icon: true
      type: button
      tap_action:
        action: toggle
      entity: light.basement_tv_lifx
styles:
  card:
    - padding: 22px
    - align-self: start
    - width: 1920px
    - height: 1080px
    - opacity: 1
    - background-color: transparent
    - border: thick
  custom_fields:
    movement_slider:
      - position: absolute
      - top: 0px
      - left: 0px
      - width: 250px
      - height: 150px
    wled_current:
      - position: absolute
      - top: 300px
      - left: |
          [[[ return states['input_number.movement_value'].state +'px'; ]]]
      - width: 250px
      - height: 150px
      - transform: >
          [[[ return 'rotate(' + states['input_number.movement_value'].state
          +'deg)'; ]]]
    test_light:
      - position: absolute
      - top: 300px
      - left: 300px
      - width: 250px
      - height: 150px
  name:
    - justify-self: start
    - align-self: start
    - font-size: 24px
    - font-weight: 500
    - color: white
Throughout the video, Bill showcases how to leverage these features to devise default buttons, tailor their aesthetics and positions, and apply CSS transformations for captivating visual effects, like card rotations. He emphasizes the ease and adaptability of this method, illustrating how it facilitates the precise organization of cards on a wide array of screens, from handheld devices to expansive touchscreens and televisions, all without the constraints of traditional grid systems.
This novel approach not only amplifies the visual allure of Home Assistant dashboards but also significantly enhances their utility, simplifying the creation of a bespoke smart home interface. Bill encourages his audience to experiment with this method and share their discoveries, promising additional guidance and tips in future offerings.
The introduction of this customization technique heralds a new era for smart home aficionados seeking to fine-tune their control interfaces to their exact specifications and preferences. Bill’s ingenious solution addresses a key challenge in home automation—crafting a cohesive, visually appealing, and functionally superior dashboard that is consistent across diverse devices. This contribution marks a significant milestone in the smart home community, equipping users with unprecedented control and customization capabilities for their Home Assistant dashboards.
Subscribe to our youTube channel today for more demos and tutorials!
https://www.youtube.com/yoyotechknows