

Tired of dashboards that just sit there? As a smart home enthusiast and creator at yoyoknows.com, I'm always looking for ways to make my interfaces more intuitive. A drag-and-drop list is your ticket to a more fluid and interactive smart home. It can take a cluttered Home Assistant setup and turn it into a clean, interactive system that the whole family can actually use.
Let's walk through how to build one using my favorite dashboard creator, Dashable. It's the secret sauce behind the amazing dashboards you see in my YouTube videos and my own Home Assistant setup.
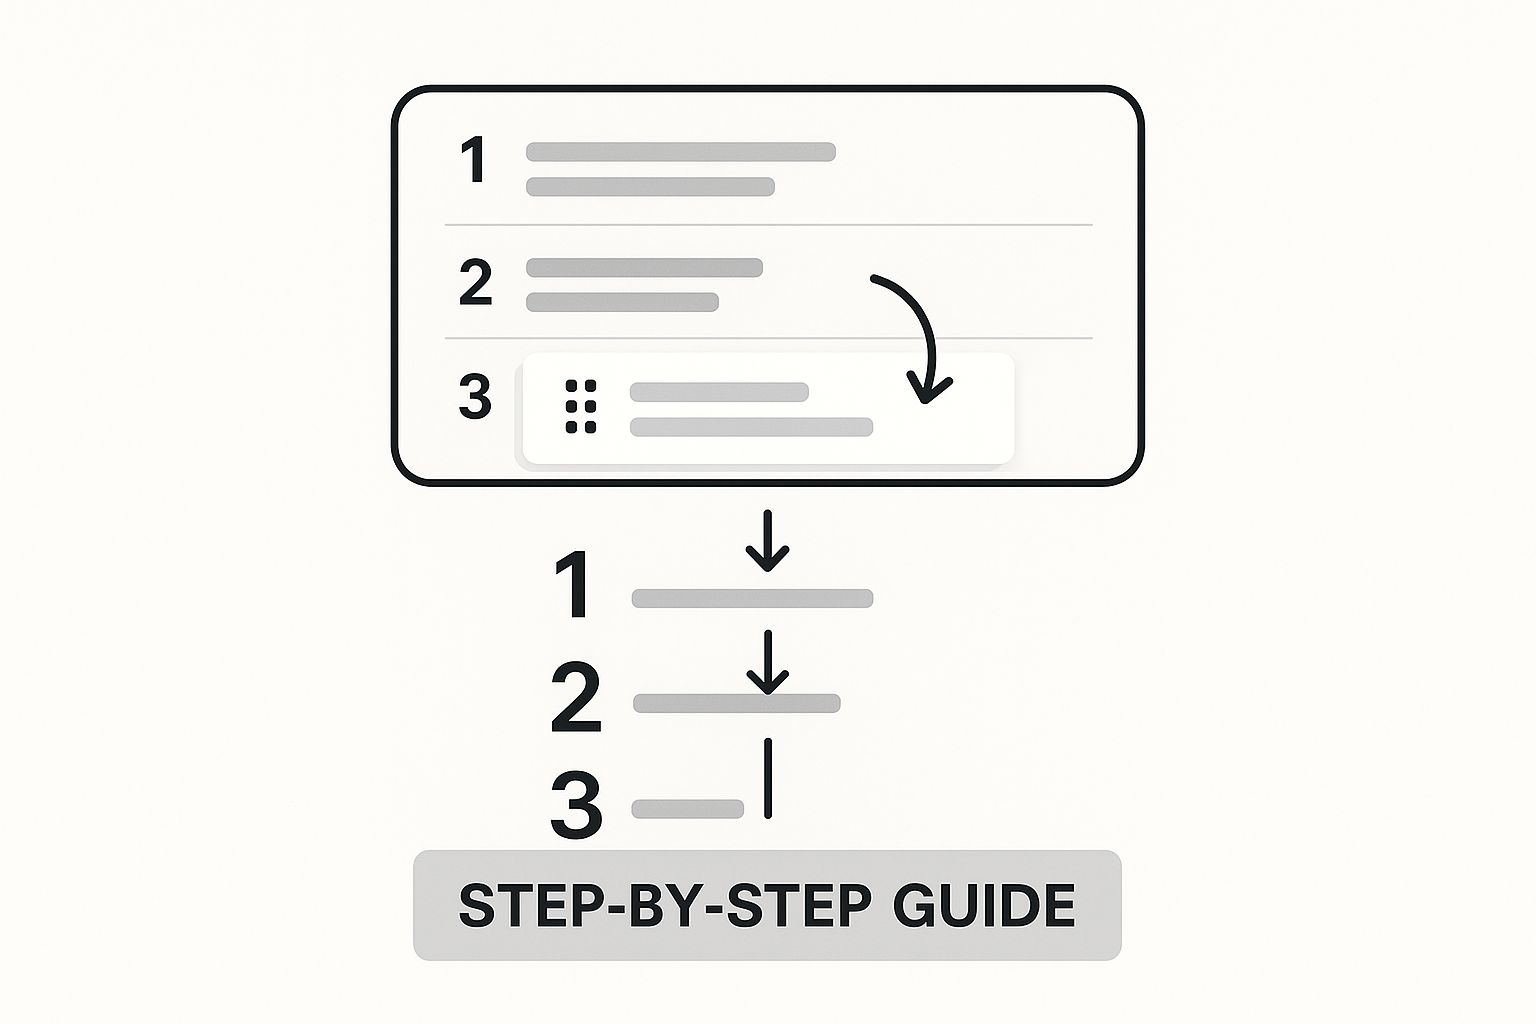
Moving Beyond Static Dashboards

If your smart home dashboard is just a wall of buttons and readouts, you're leaving a ton of interactive potential on the table. For years, my own Home Assistant interface was functional, sure, but it was also completely static. It showed me information but didn't let me do much besides toggle things on and off. I knew there had to be something better—an interface that could actually adapt to my day.
Think about it: what if you could reorder your morning routine tasks on the fly? Or bump up your weekend automations with a simple gesture? This is exactly where a drag-and-drop list changes the game, transforming your dashboard from a passive display into an active control center.
The Power of An Interactive List
The idea of dragging and dropping items isn't new, of course. It’s been a staple of user interfaces since the 1970s, when systems like the Xerox Star first let people manage files with a mouse instead of typing cryptic commands.
Today, we can bring that same simple, intuitive feel to our smart homes. With a tool like Dashable, we can build dashboards that feel alive. Instead of just looking at data, you get to manipulate it directly. This is a core part of my smart home philosophy—making tech feel natural and easy to use.
This shift in thinking is huge. It moves your interaction with your smart home from a basic command-and-response model to fluid, context-aware management. You're not just triggering actions anymore; you're organizing your home's logic in real time.
Why This Approach Is So Effective
The real magic happens when you tie this interactivity back into Home Assistant. A well-designed list isn't just for looks; it can trigger complex automations, update entity states, and organize entire workflows. The key is to design your dashboard so your most-used controls are right where you need them.
Here’s why building a dynamic drag-and-drop list is worth the effort:
- Intuitive for Everyone: The whole family can easily reorder items without needing a crash course in YAML or backend logic.
- On-the-Fly Prioritization: Instantly adjust the sequence of events. Want to start the "Movie Night" scene now? Just drag it to the top.
- Better Organization: Manage everything from a family chore chart to a project tracker right from your smart home dashboard.
In the rest of this guide, we'll get into the nitty-gritty of building one of these powerful lists from the ground up.
Laying the Groundwork in Home Assistant and Dashable
Before you can start satisfyingly dragging and dropping tasks, a little prep work is needed. We have to build the foundation first, which involves setting up the backend storage in Home Assistant and then hooking it up to the visual front-end in Dashable. Don't worry, it's a quick process.
Think of it this way: Home Assistant will be the "brain" holding the list, and Dashable will be the "face" where you interact with it—the beautiful, customizable dashboard that makes it all possible.
Creating the Home Assistant Helper
First things first, let's jump into your Home Assistant instance. This is where we’ll create a home for our drag and drop list data. The perfect tool for this job is the input_text helper. It’s essentially a simple text field that Home Assistant can read from and write to. Every time you reorder your list in Dashable, the new order gets saved right here.
To get started, navigate to Settings > Devices & Services > Helpers and click the "Create Helper" button. From the options that pop up, choose "Text".
Now for a pro tip that will save you a world of pain down the road: naming conventions. I've learned from experience to always prefix my helpers based on what they do.
- Good name:
input_text.drag_list_morning_routine - Confusing name:
input_text.list1
This small habit makes finding entities for automations a thousand times easier. After creating your input_text helper, you can go ahead and pre-populate it with a few items separated by commas, like "Make Coffee,Walk Dog,Check Email".
The
input_texthelper acts as the critical bridge. It connects our visual Dashable interface with Home Assistant's automation engine. When you reorder the list, Dashable simply tells Home Assistant, "Hey, update the text in this entity," which can then kick off your automations.
Connecting to Your Dashable Dashboard
With our backend storage ready to go, it’s time to switch over to Dashable. This is where we’ll build the visual card that you'll actually be touching and rearranging. As a heavy user of Dashable, I can tell you this part is incredibly straightforward.
Open your Dashable dashboard and add a new card. It will prompt you to link it to a Home Assistant entity, and this is where our careful naming really shines. Just search for the input_text helper you just created (e.g., input_text.drag_list_morning_routine).
Once you link it, the card establishes a live, two-way connection. It can now read the current value from the input_text helper and, more importantly, write back to it. This connection is the heart of the whole setup.
At this point, we aren't enabling the drag-and-drop functionality itself—that comes next. What you should see is a simple card on your dashboard displaying the comma-separated text from your helper.
We’ve now built a solid connection that will power our interactive list. Up next, we’ll bring it to life by transforming this plain text display into a fully functional drag-and-drop interface.
Building Your First Interactive Drag and Drop List
Alright, with the groundwork laid in Home Assistant, it's time for the fun part. We're heading into the Dashable editor to turn that basic text card into a fully functional drag and drop list. This is where the magic really happens, transforming a static piece of text into an interactive element you can actually use to control your smart home.
I’m going to walk you through the exact settings you need, but more importantly, I'll explain why we're changing them. Understanding the logic here will help you build all sorts of cool interactive controls down the road for your own smart home dashboards.
To make this practical, we'll build a "Weekend Projects" list, just like the one I use to keep my own smart home tasks in order.
Configuring the List Card in Dashable
First, open your Dashable dashboard and click on the card we linked to your Home Assistant input_text helper. In the card's configuration panel on the right, you’ll find all the options that control its appearance and behavior. Our goal is to switch its type from a simple text display to an interactive list.
Find the setting that lets you define the card type and change it to "List". As soon as you do, a bunch of new configuration options will pop up. These are the toggles and fields that unlock the drag-and-drop functionality we're after.
This process is a great example of how Dashable lets you take a simple data source and give it a powerful, interactive front-end with just a few clicks. It's one of the main reasons I use it for all my home automation projects.
Defining Your List Items and Behavior
The next critical step is teaching Dashable how to read the data from Home Assistant. Right now, our input_text helper is just a single string of text with items separated by commas. We need to tell the card how to break that string apart into individual, movable items.
Look for an option called "Separator" or "Delimiter". In this field, simply enter a comma (,).
This one simple character tells the card, "Hey, every time you see a comma, start a new list item." Once you apply this, you should immediately see your plain text transform into a clean, vertical list of distinct entries.
Now, let's make it interactive. Find the toggle or checkbox labeled something like "Enable Dragging" or "Reorderable" and flip it on. This is the switch that adds the little drag handles and makes each item in your list movable.
That’s it! You now have a working drag-and-drop list. Try moving an item up or down. You'll see that the
input_texthelper in Home Assistant updates instantly to reflect the new order. This real-time sync is what makes this setup so incredibly powerful for automations.
To make sense of all the settings, here's a quick reference table for the most important properties you'll be working with in the Dashable list configuration.
Essential Dashable List Configuration Properties
| Property Name | What It Controls | Example Value |
|---|---|---|
| Type | The fundamental behavior of the card. | List |
| Separator | The character used to split the source text into items. | , |
| Enable Dragging | Toggles the ability to reorder list items. | true |
| Item Background | The color of each individual item in the list. | #222222 |
| Item Spacing | The vertical gap between each list item. | 8px |
This table covers the essentials, but don't be afraid to explore the other options to get the exact look and feel you want for your smart home dashboard.
Fine-Tuning Your List's Appearance
With the core functionality locked in, you can start polishing the design. A well-styled list isn't just about looks; it makes your dashboard easier and more enjoyable to use, especially on a touchscreen.
Here are a few adjustments I almost always make:
- Item Styling: Tweak the background color, border, or font size to match the rest of your dashboard's theme. A cohesive look makes a huge difference.
- Handle Icons: Some themes let you change the drag handle icon. It’s a small detail, but it can give your list a more custom, polished feel.
- Spacing and Padding: Adding a bit more space between items can dramatically improve readability and make them easier to grab with your finger.
On my own "Weekend Projects" list, I use a subtle background color change when I hover over an item. This provides clear visual feedback that I'm about to drag something. It’s these small, thoughtful touches that elevate a good dashboard into a great one. You've now successfully built a powerful interactive list from scratch, ready to be integrated into your smart home automations.
Making Your List Smart with Home Assistant Automations
Having a list is one thing. Having a smart list that actually does things? That's where your smart home really starts to feel alive. Now that you have a slick, reorderable drag and drop list in your Dashable dashboard, it's time to hook it into the brains of your operation: Home Assistant.
This is the step that turns a simple list into a powerful control center for your entire smart home.
Think about it. You could have a "Scenes" list on your dashboard. When you drag 'Movie Night' to the top of that list, your smart lights could automatically dim, the TV could fire up, and the thermostat could adjust to the perfect temperature. This isn't just a cool idea; it's exactly what we're going to set up. The whole trick relies on using Home Assistant's event bus to listen for changes you make on the dashboard.
Firing Automations When the List Changes
Every single time you reorder an item in your Dashable list, the input_text helper you created in Home Assistant gets a new value. That state change is the perfect trigger for an automation.
Inside Home Assistant’s automation editor, all you have to do is create a trigger that watches for any state change on that specific input_text entity.
Once the automation is triggered, you can use conditions to figure out what the new order is. For instance, you can build a condition that checks if the very first item in the list is now "Movie Night".
Let’s walk through what that "Movie Night" automation would look like:
- Trigger: The state of
input_text.scenes_listchanges. - Condition: Check if the value of
input_text.scenes_listnow starts with "Movie Night". - Action: Call the
light.turn_onservice to dim the lights, run your media player script, and tell your climate entity to get cozy.
This simple "trigger, condition, action" logic is the foundation for all sorts of amazing workflows, all started with a simple drag-and-drop. It's the same kind of powerful, customized control you might use for more complex setups, like when integrating your Tesla with Home Assistant.
By listening for state changes on your
input_texthelper, you're turning a visual list into a remote control for your home's automations. You're not just rearranging text; you're sending direct commands without ever leaving your dashboard.
Adding Some Style with Custom CSS
Functionality is key, but let's be honest—looks matter. A dashboard you enjoy looking at is one you'll actually use. Dashable lets you inject custom CSS into your cards, giving you total control over the appearance of your new list. This is how you go from a default-looking element to something that feels truly integrated into your smart home dashboard's theme.
And you don't need to be a CSS wizard to make a big difference. Just a few lines can completely transform the look and feel.
For example, you could tweak the font to match your other cards, change the color of the drag handles so they stand out, or even add a subtle shadow to each list item to give it some depth. Little touches like hover effects can also add a ton of polish, giving you visual feedback as you move your cursor over an item.
Here are a few ideas to get you started:
- Customize Fonts and Colors: Make the list's typography and color palette match the rest of your dashboard. Cohesion is everything for a professional-looking setup.
- Add Hover Effects: Change an item's background color when you hover over it. This little cue signals to the user that the item is interactive and ready to be dragged.
- Style the Drag Handle: Want the drag handle to be more obvious? Or maybe you want to change its icon? A bit of CSS makes that easy.
These small cosmetic changes have a huge impact on usability. They provide subtle visual cues that make the interface feel more intuitive and responsive. When you combine powerful Home Assistant automations with thoughtful Dashable styling, you end up with an interactive experience that’s not just incredibly useful, but genuinely beautiful.
Real World Use Cases for Your Smart Home

Alright, we've got our list built and talking to Home Assistant. Now for the fun part: moving from the technical setup to how this actually makes life easier. A drag and drop list is way more than a neat gimmick; it’s a seriously powerful tool for managing your home.
I figured the best way to show you what's possible is to pull back the curtain on my own setup. These are a few of the systems I use every single day—they’re battle-tested and genuinely useful. For each one, I’ll break down the Home Assistant helpers you'll need and the basic automation logic to give you a solid blueprint to build from.
The Dynamic Family Chore Chart
Let's be honest, managing chores can be a nightmare. In my house, we turned it into a game using a dynamic list on our main kitchen dashboard. Everyone has their own section, and dragging a chore over to the "Done" column triggers a fun notification.
- Home Assistant Helpers: You'll want an
input_texthelper for each person's list. Thinkinput_text.chores_yoyo,input_text.chores_kid1, and so on. - Automation Logic: Set up an automation to fire whenever any of those
input_texthelpers change. The magic happens in the conditions, where you check if a specific task (like "Empty Dishwasher") has been moved to the end of the list. When it is, the action can send a push notification or even tick up an allowance counter.
This little system completely changed the dynamic around chores. It’s a perfect example of why drag-and-drop interfaces are so effective. It’s interactive and satisfying. It’s not just a smart home thing, either—some project management tools have seen user engagement jump by as much as 65% just by adding drag-and-drop functionality. We're just applying that same successful principle here.
Prioritized Weekend Project List
My weekend to-do list often feels endless. To keep myself from getting overwhelmed, I use a prioritized list on my office Dashable dashboard. When I'm ready to start something, I drag it to the top. For example, moving "Install new smart switch" to the number one spot signals to my system that it's go-time.
- Home Assistant Helpers: Super simple—all you need is a single
input_text.weekend_projectshelper. - Automation Logic: The automation triggers on any state change to that helper. A condition then checks what the new first item is. Based on that, the action can do something useful, like sending me a phone notification with a link to the installation guide or turning on the lights in the workshop.
This simple setup helps me stay focused. By reordering the list, I'm not just organizing text; I'm queuing up the resources and environment I need for my next task.
The Automated Guest Prep Checklist
Getting the house ready for guests used to be a mad scramble of running around doing a dozen little things. Now, I have a "Guest Prep" list that automates a good chunk of it. As I complete tasks and reorder the list on my tablet, my home gets to work in the background.
- Home Assistant Helpers: Just one helper is needed:
input_text.guest_prep_checklist. - Automation Logic: As soon as I drag "Prepare Guest Room" to the top of the list, an automation kicks in. It automatically sets the guest room thermostat to a comfortable temperature, turns the bedside lamp on to a welcoming dim glow, and makes sure the smart speaker is ready to go. It's a small touch, but it makes a huge difference.
Common Questions About Drag and Drop Lists
As you start playing around with your first interactive drag and drop list, a few questions are bound to pop up. I get asked these all the time on my YouTube channel, so I've put together the most common ones here to help you get a clearer picture of how this all works.
What Happens If Home Assistant Is Offline?
This is a great question and a common concern. If your Home Assistant server ever goes offline, don't worry—your Dashable dashboard will still load just fine. You'll see the list in its last known state, exactly as it was before the connection dropped.
The only thing that won't work is the reordering itself. Because the input_text helper in Home Assistant is the backend "brain" storing the list's order, any changes can only be saved when that connection is active. As soon as Home Assistant comes back online, the drag and drop functionality will kick back in automatically. No need to refresh or do anything special.
Can I Use This List On My Mobile Phone?
Absolutely! This is one of the best parts of building your smart home dashboards with Dashable. The platform is fully responsive right out of the box, so your drag and drop lists will look and work great on any device—from a big desktop monitor down to your phone.
The drag-and-drop mechanics are designed to be touch-friendly, which makes it incredibly convenient. You can rearrange your morning routine or manage your to-do list from anywhere, whether you're at your desk or lounging on the couch.
How Many Items Can I Have In My List?
There is a technical limit, but for most people, it's not something you'll ever hit. The standard input_text entity in Home Assistant has a default character limit of 255 characters.
For typical lists like a morning routine, a scene selector, or a weekly chore chart, this is plenty of space. You'd have to be creating an exceptionally long list to run into trouble. For 99% of smart home use cases, you'll be perfectly fine.
Ready to build dashboards that are as smart and interactive as your home? Get started with Dashable and create your first drag and drop list today at https://dashable.app.


