

Did you know you can turn that little Raspberry Pi into a full-fledged radio transmitter? It's the perfect way to broadcast your own audio, whether you're setting up smart home alerts or syncing music across your house. As a tech creator at yoyoKnows, I love projects that merge DIY fun with powerful smart home automation, and this is one of my favorites. The project taps into the Pi's GPIO pins to generate a low-power FM signal, letting you beam audio to any standard FM radio nearby.
Your Next Smart Home Project: A DIY Radio Transmitter
Imagine your home filled with perfectly synced holiday music playing from every radio in every room. Or what if your Home Assistant setup could announce important alerts audibly? This isn't some complex, high-dollar installation. It's a surprisingly practical and rewarding DIY project that adds a whole new layer to your smart home.
This is hands-down one of the most exciting projects for any home automation fan. It just opens up so many creative possibilities:
- Whole-Home Audio: Forget about Wi-Fi or Bluetooth pairing. Just stream a single audio source to multiple FM radios at once.
- Custom Smart Alerts: Picture your system announcing, "The back door has been opened," or "Leak detected in the basement," over a dedicated channel.
- Drive-In Style Movie Nights: Broadcast your movie's audio straight to car stereos for an authentic outdoor theater experience.
To give you a clearer picture of what's involved, here’s a quick overview of the project's scope.
Raspberry Pi Transmitter Project At a Glance
This table breaks down the essentials, from what you'll need to buy to the skills you'll be using.
| Component | Estimated Cost | Required Skill Level | Primary Use Case |
|---|---|---|---|
| Raspberry Pi (3B+ or newer) | $35 – $55 | Beginner | Core computing and signal generation |
| MicroSD Card (16GB+) | $5 – $10 | Beginner | Operating system and software storage |
| Antenna Wire | ~$5 | Beginner | Signal transmission |
| Software (PiFM, etc.) | $0 (Open Source) | Intermediate (CLI) | Generating the FM broadcast signal |
As you can see, the hardware costs are minimal, making this an incredibly accessible project for anyone looking to get their hands dirty with some practical radio tech.
The Magic of GPIO Broadcasting
So, how does this all work? The real secret sauce is the Raspberry Pi's General Purpose Input/Output (GPIO) pins. Ever since the Pi first hit the scene back in 2012, the DIY and educational radio communities have been fascinated by it. Enthusiasts quickly figured out that the GPIO pins could be manipulated to generate radio frequency signals directly, which meant you could build a low-power FM transmitter without any extra hardware shields.
This concept really took off in 2015 when physicist Alex Eames famously used a tiny Pi Zero to broadcast an FM signal, getting a ton of people interested. This project is a fantastic entry point into the world of software-defined radio (SDR) and really shows off how versatile these little computers are. If you're into similar DIY projects that mix networking with smart devices, you might want to check out our guide on the ISG from Linknlink smart device is straightforward to set up and use, yet it comes with some hidden superpowers.
Visualizing Your Control Center
Once you have your transmitter up and running, you'll want an easy way to manage it. This is where a dedicated dashboard comes in handy. I personally use Dashable to build amazing dashboards for my home assistant setup.
With a custom dashboard from Dashable, you can create controls to start and stop broadcasts, switch audio sources, or even change the frequency on the fly—all from your phone or a wall-mounted tablet.
This approach takes a technical backend project and wraps it in a user-friendly interface that anyone in your home can use. Later in this guide, we'll walk through exactly how to build this kind of dashboard, tying the whole project together into a polished, professional-grade smart home feature. For now, let's get building
What You'll Need: Hardware and Software Essentials
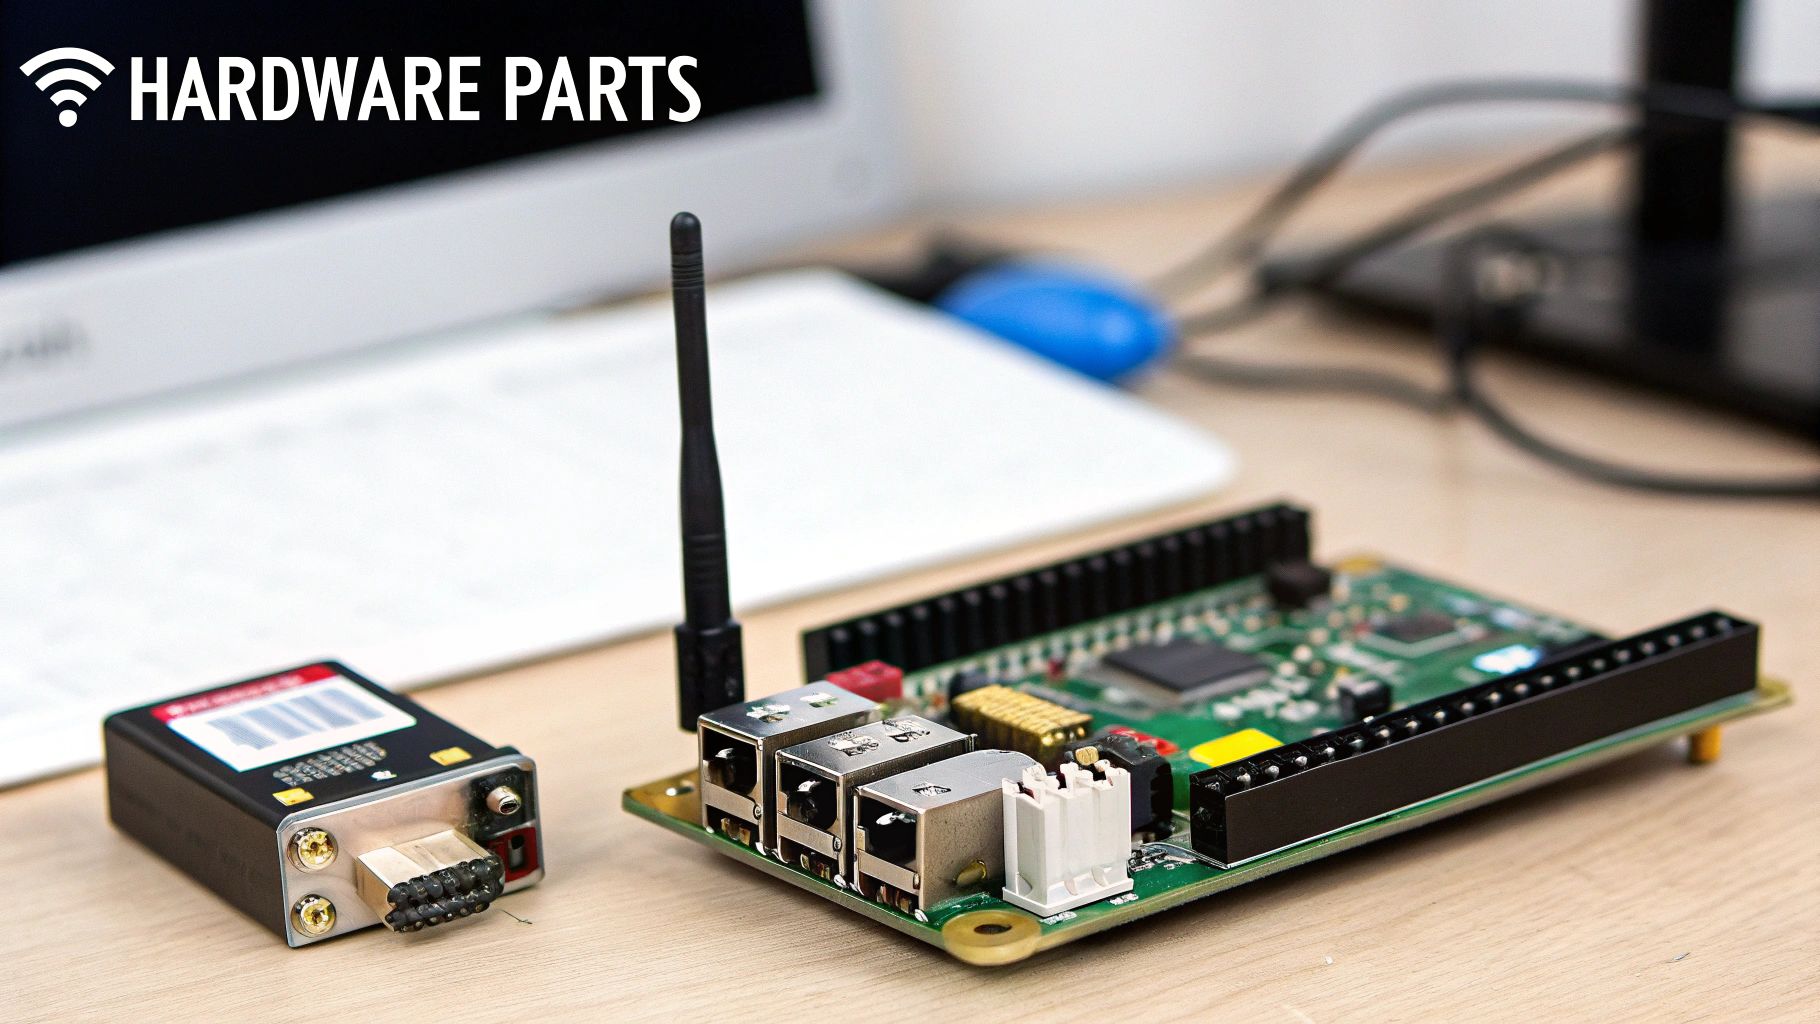
Before we dive into the fun stuff, let's get our workbench in order. Rounding up all the right components now will save you from a lot of head-scratching later. Think of it like cooking: you get all your ingredients prepped and ready before you even turn on the stove.
The heart of our project is, of course, the Raspberry Pi. While you could technically get an older model to work, I really suggest sticking with a Raspberry Pi 3B+ or a Raspberry Pi 4. They have the horsepower needed to deliver a stable, clean audio stream without any annoying stutters. Quick heads-up: the Pi 5 isn't a good choice for this specific project because of some changes in how it manages GPIO access.
It's pretty amazing how these little boards have taken off. The industrial Raspberry Pi market alone was valued at roughly $1.2 billion in 2023 and is expected to soar to $3.5 billion by 2032. A big part of that is thanks to IoT projects and smart systems—just like the one we're building. If you're curious, you can dig into the numbers in the full radio transmitter market research.
The Core Hardware Checklist
Now that we've picked our Pi, let's gather the other bits and pieces. Don't worry, this isn't an expensive shopping list; most of these items are cheap and easy to find.
- A Good Power Supply: Please don't skimp on this. I've seen countless projects fail because of a weak power supply. You'll want an official one or a quality third-party supply that can deliver at least 5V and 3A.
- A MicroSD Card: A 16GB card is more than enough space for the operating system and our broadcasting software. Stick with a well-known brand to avoid potential data corruption issues down the road.
- An Antenna Wire: Nothing fancy is required here. A simple 20-gauge single-core jumper wire is perfect for the job. The length of this wire is what really matters for your signal quality, and we’ll get into how to calculate the perfect length in a bit.
Pro Tip: For the FM band (88-108 MHz), the simplest and most effective antenna is a quarter-wave monopole. If you’re aiming for a frequency like 100 MHz, a wire that’s about 75 cm (or roughly 30 inches) long is the sweet spot.
Getting the Software Ready
With our hardware sorted, let's talk software. This part is pretty straightforward. We just need an operating system for the Pi and the magic piece of code that will turn it into a tiny radio station.
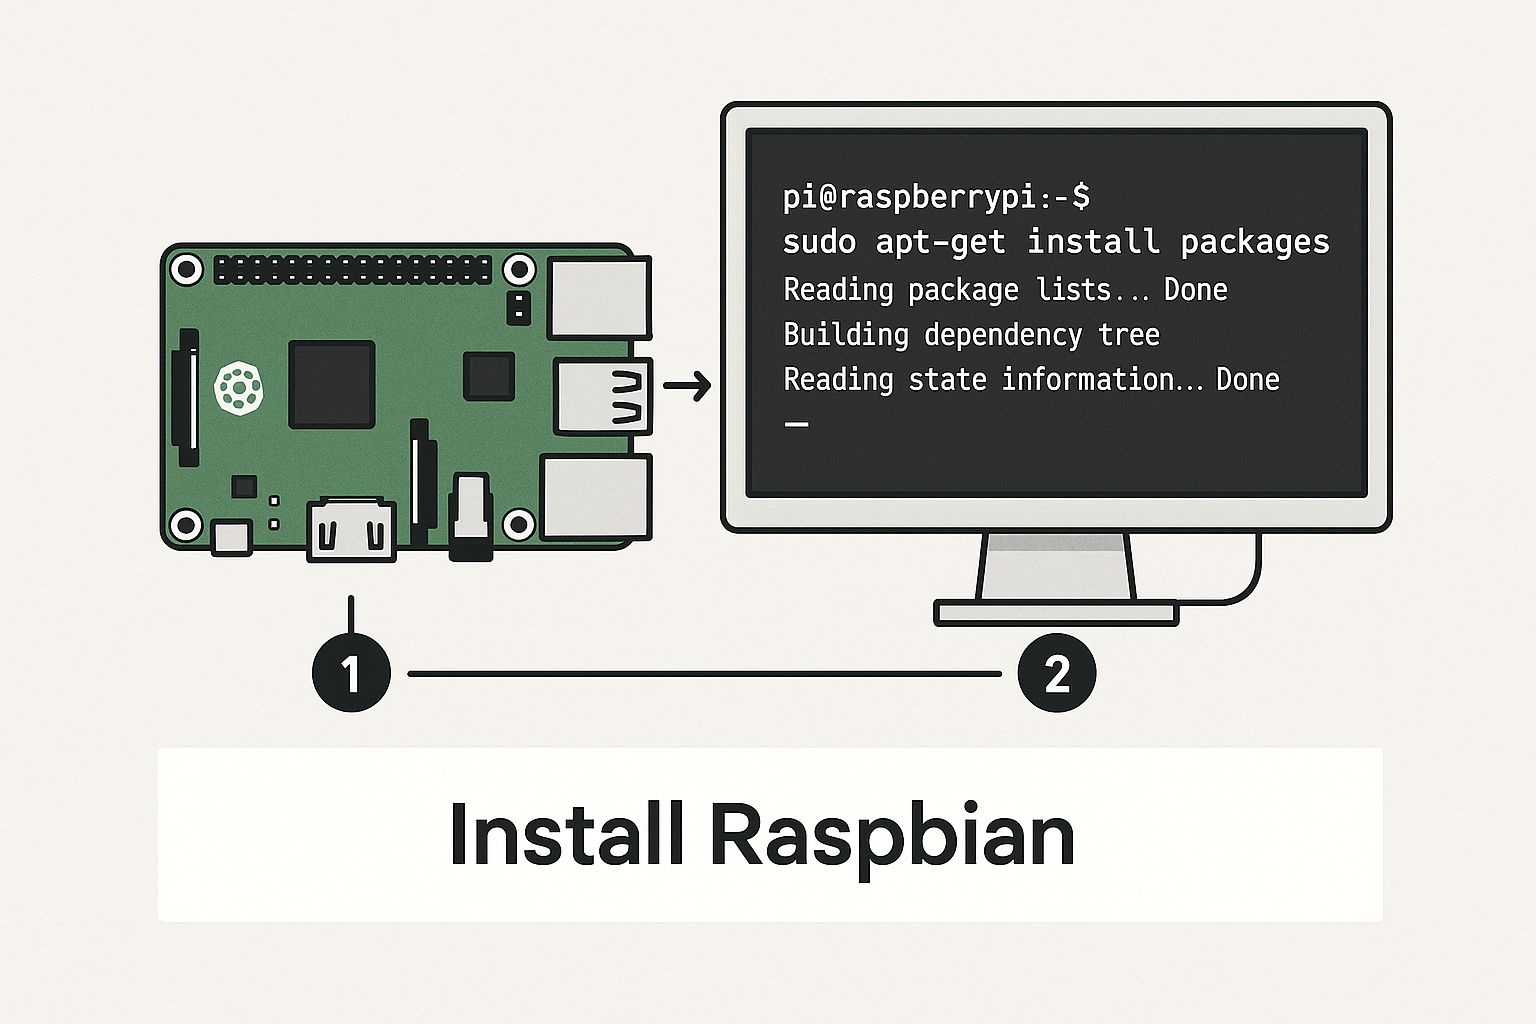
For the OS, my go-to is always Raspberry Pi OS (formerly Raspbian). It’s tailor-made for the hardware and has a huge community, so finding help is easy. I personally recommend the "Lite" version. Since we’ll be using the command line, there's no need for a full desktop environment, which keeps things lean and fast.
The software that makes this entire project possible is PiFmRds. It’s a brilliant open-source tool from Christophe Jacquet that lets us generate a real FM signal right from one of the Pi’s GPIO pins. It’s incredibly powerful—you can broadcast not only your audio but also Radio Data System (RDS) text, which shows up as the song title or station name on compatible radios.
Once you have your Pi, power supply, microSD card, and antenna wire, you're all set for the next step. We'll get Raspberry Pi OS installed and then download and compile PiFmRds to get your transmitter ready for its first broadcast. This setup also lays the groundwork for more advanced projects, like using a tool like Dashable to build a slick dashboard for controlling your broadcasts.
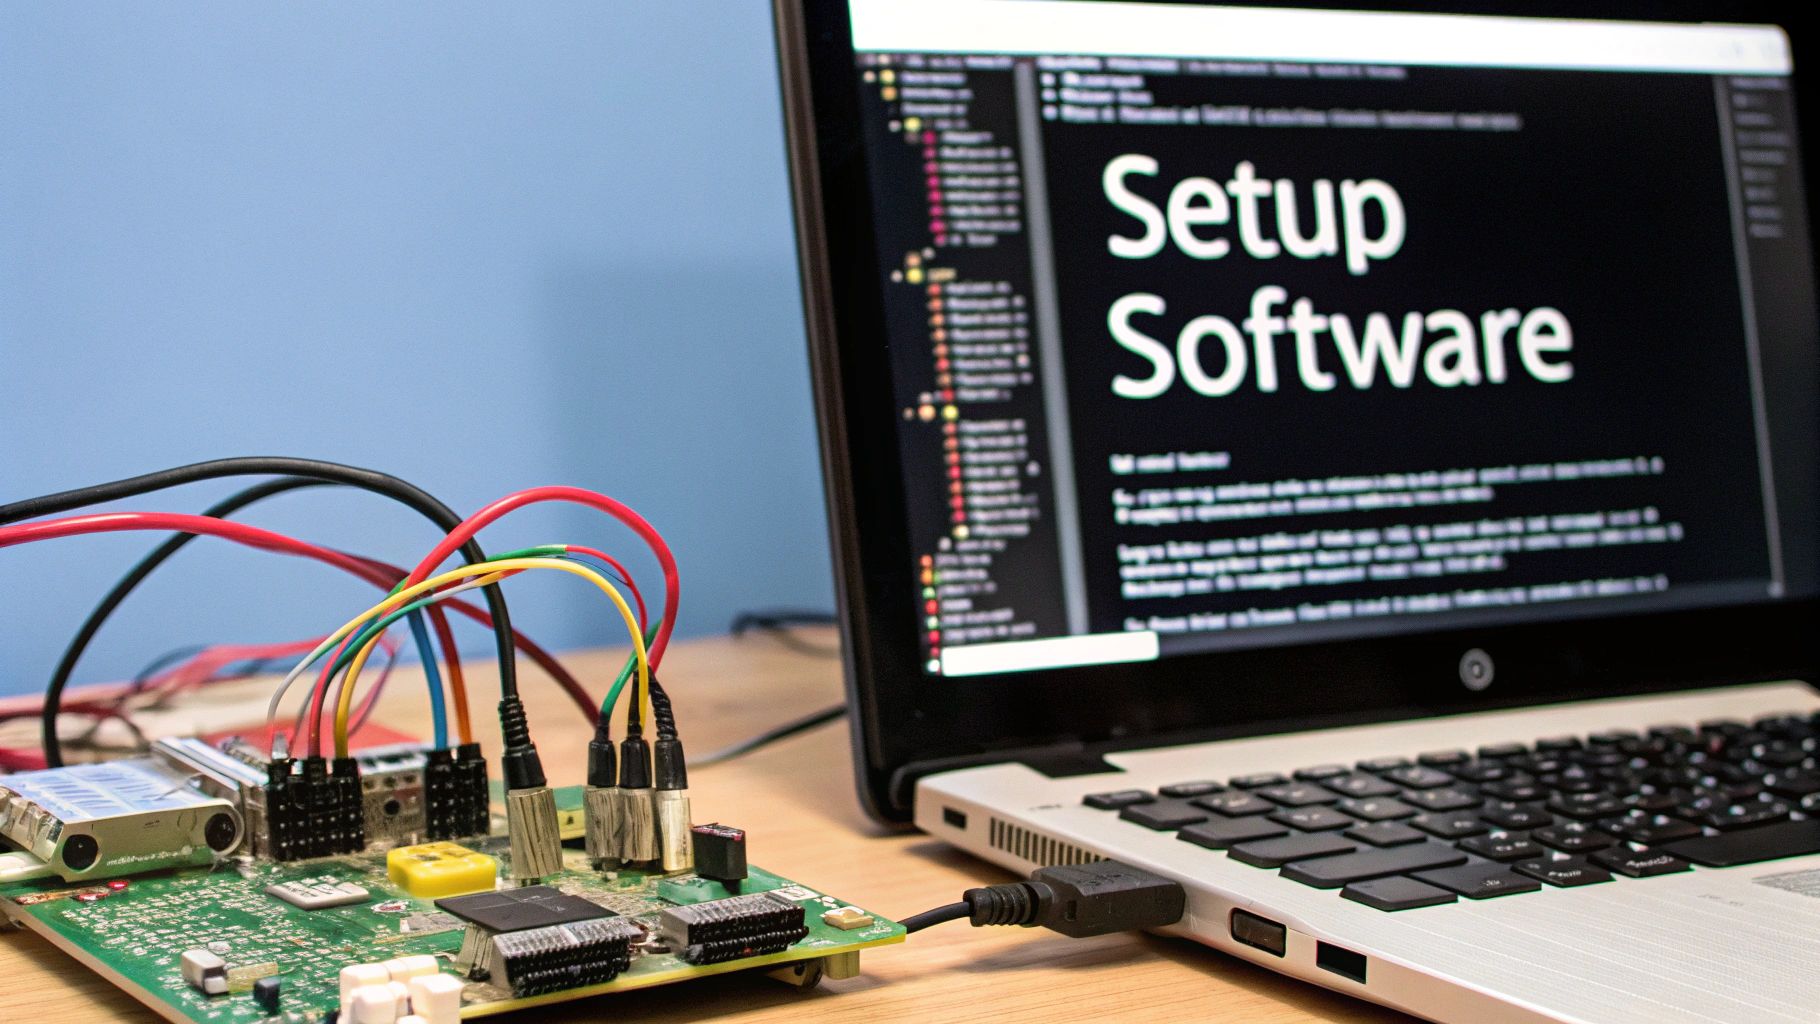
Bringing Your Transmitter to Life with Software
Alright, you've got your hardware ready. Now for the fun part: making it actually do something. This is where we’ll dive into the software side of things and turn that little Raspberry Pi into a real-deal radio transmitter. We're going to grab the necessary code, build it, and then run our very first broadcast.
If you're not super comfortable with the command line, don't sweat it. I'll walk you through everything, step-by-step, without getting bogged down in overly technical stuff. Our first task is to clone the software right from its home on GitHub, which guarantees we're working with the latest and greatest version.
As you can see in the image below, getting the software running starts in the terminal, which is the command center for our entire project.
This initial setup creates a solid foundation, which is exactly what we need for our broadcasting tools to work reliably.
Installing the PiFmRds Software
The magic behind this whole operation is an open-source tool called PiFmRds. This is the software that takes an audio file and works its sorcery to modulate it into an FM signal that the Pi can broadcast through its GPIO pin. We'll start by grabbing it from GitHub.
Fire up a terminal window on your Raspberry Pi. First, you'll need git, which is a command-line tool for downloading and managing code. If you don't have it installed already, you can get it with this simple command:
sudo apt-get install git
With git ready to go, you can now "clone" the PiFmRds repository. This command simply downloads a full copy of the project right onto your Pi.
git clone https://github.com/ChristopheJacquet/PiFmRds.git
Once that finishes, you'll see a new PiFmRds directory in your home folder. That folder contains all the source code we need.
Compiling the Code
We have the source code, but the Pi can't run it just yet. We need to compile it first. Think of compiling as translating the human-readable code we just downloaded into machine language that the Raspberry Pi's processor understands. This can be an intimidating step for newcomers, but thankfully, the process for PiFmRds is pretty straightforward.
First, navigate into the source directory that was just created:
cd PiFmRds/src
Inside, you'll find the files required to build the program. We'll use a tool called make to kick off the compilation process. Just type the command and hit enter.
make
Quick Tip: If you hit an error here, it's almost always because of missing build tools. The easiest fix is to install the
build-essentialpackage, which bundles all the core compilers you'll need. You can do that withsudo apt-get install build-essential.
If everything went smoothly, you'll now have a new file named pi_fm_rds in that src directory. That’s it—that's our transmitter program! Seeing that file means you’ve successfully built the software and are just one step away from broadcasting. By the way, keeping your system in good shape is key for projects like this; if you're running multiple devices, getting familiar with the essentials of Linux server monitoring is a real game-changer for system health.
Your First Test Broadcast
This is the moment of truth. Let's see if our work paid off by running a quick test broadcast. You'll need an audio file for this, and luckily, the PiFmRds software includes a sample sound.wav file that's perfect for our first try.
The command to start broadcasting might look a little chunky at first glance, but each part has a very specific purpose. Here's what it looks like:
sudo ./pi_fm_rds -freq 107.9 -audio sound.wav
Let’s quickly break that down:
sudo: This is essential. It gives the program the administrator-level permissions it needs to access the GPIO hardware../pi_fm_rds: This tells the system to run the program we just compiled.-freq 107.9: This is where you set the broadcast frequency. This part is critical—you absolutely must pick a frequency that is empty in your local area to avoid illegally interfering with licensed stations.-audio sound.wav: This points the program to the audio file you want to play.
Before you hit Enter, grab a nearby FM radio and tune it to 107.9 MHz (or whatever frequency you chose). Now, run the command. You should hear the audio from that sound.wav file coming through your radio's speakers.
Success! You just turned a Raspberry Pi into a working radio transmitter.
You've got your Raspberry Pi broadcasting on the FM dial. That's a huge win in itself, but the real fun begins when you weave this little gadget into your smart home. This is the part where a cool DIY project transforms into something genuinely useful in your day-to-day life.
Imagine your home actually talking to you. Instead of just a buzz on your phone, you hear a clear voice from any nearby FM radio saying, "The garage door is still open" or "Motion detected at the front door." This is exactly what we can do by hooking our Raspberry Pi radio transmitter into Home Assistant.
This simple integration takes our project from a manually operated tool to a fully automated notification powerhouse. It’s a tiny example of a massive trend; the global radio transmitter market sits at around $2.08 billion and is expected to climb to $3.37 billion by 2029, thanks to its growing role in IoT and smart communications. Our little project is a perfect slice of that pie. You can get a better sense of these trends by reading up on the growth of radio transmitter technology.
Triggering Broadcasts From Home Assistant
The bridge between Home Assistant and our transmitter is the Shell Command integration. It’s a seriously powerful feature that lets Home Assistant run commands on other machines, which in our case is the Raspberry Pi running PiFmRds.
First, you'll need to set up passwordless SSH access from your Home Assistant device to the Pi. This is a crucial step that allows Home Assistant to securely send commands without you having to punch in a password every time an automation runs. Once that's done, you can add shell commands right into Home Assistant’s configuration.yaml file.
Here's a practical example of how you might set it up:
shell_command:
broadcast_garage_alert: 'ssh pi@ "sudo /home/pi/PiFmRds/src/pi_fm_rds -freq 107.9 -audio /home/pi/audio/garage_open.wav"'
stop_broadcast: 'ssh pi@ "sudo pkill pi_fm_rds"'
In this snippet, we've created two handy commands:
broadcast_garage_alertlogs into the Pi and immediately starts broadcasting a pre-recorded "garage_open.wav" file.stop_broadcastis our kill switch. It finds thepi_fm_rdsprocess on the Pi and shuts it down, ending the transmission.
With these commands in place, you can trigger them from any Home Assistant automation. For example, set up an automation that calls the broadcast_garage_alert service the moment your garage door sensor switches to "open."
Creating A Control Center With Dashable
Automations are great for hands-off tasks, but what about when you want to take direct control? That’s where Dashable shines. I use it for all my smart home dashboards because it makes building beautiful, functional interfaces incredibly easy. We can use it to build a slick control panel for our Raspberry Pi radio transmitter without writing a single extra line of code.
Using Dashable’s drag-and-drop builder, you can put together a dedicated dashboard for your transmitter. Picture a clean interface with big, friendly buttons for all the main actions.
Dashable takes a command-line project and makes it accessible to everyone in your house. No more SSHing into the Pi—just tap a button on a tablet or phone to start, stop, or change the broadcast.
Here’s a quick rundown of what you could build:
- Start/Stop Buttons: Link these directly to the shell commands you created. One tap could start a playlist, and another could kill the broadcast instantly.
- Audio File Selector: In Home Assistant, create an
input_selecthelper with a list of your audio files. Then, in Dashable, you can display this as a dropdown menu to choose what you want to play. - Frequency Control: For the more adventurous, you could create an
input_numberhelper in Home Assistant and link it to a slider in Dashable to change the broadcast frequency on the fly.
Building a dedicated interface like this makes the whole system feel polished and complete. If you're looking for more tips on making your dashboards look great, check out this guide on creating perfectly positioned dashboards for your smart home automation. Marrying your DIY transmitter with a thoughtfully designed Dashable UI is the final step in making it a truly seamless part of your smart home.
Fine-Tuning Your Signal and Staying on the Right Side of the Law
https://www.youtube.com/embed/WnKK11UEvVE
Alright, so you’ve got your Raspberry Pi radio transmitter up and running. This is where the real fun begins, but it's also where we need to be smart and responsible. We're going to cover two things that go hand-in-hand: getting the best possible signal and making sure your project doesn't get you into hot water.
Building a transmitter is a fantastic learning experience, but the moment you send a signal over the air, you're sharing public space. Your fun little project can’t be the reason someone else’s favorite station gets drowned in static or, much worse, interfere with critical communications like air traffic control. Don't worry, though—staying compliant is pretty easy once you know the rules of the road.
Navigating the Airwaves Legally
First things first: always broadcast on a completely empty frequency. Before you even think about running the software, grab a portable FM radio and slowly scan the entire band in your location. Jot down any frequencies that are dead silent. No static, no distant music, just quiet. Those are your candidates.
Regulatory bodies like the FCC are pretty clear about unlicensed broadcasting. The whole point is to keep your power output so low that the signal basically stays on your property. Thankfully, the PiFmRds software is designed for this exact kind of low-power, short-range transmission right out of the box.
Key Takeaway: Playing by the rules is non-negotiable. Stick to vacant frequencies and use the lowest power you need. Messing with a licensed broadcast can bring serious trouble, and nobody wants that.
Here are a few good habits to get into:
- Scout Your Frequencies: The airwaves aren't static. A frequency that’s open today might be in use tomorrow. Give the dial a quick scan every now and then to make sure your spot is still clear.
- Keep Your Range in Check: The goal is personal use, not creating a pirate radio station. A simple, short antenna is your best friend for keeping the signal confined to your house or yard.
- Mind Your Content: To steer clear of any copyright headaches, just broadcast audio you own or that’s in the public domain.
Dialing in Your Signal Quality
Now, let's make it sound good. Getting a crisp, clean broadcast is part science, part tinkering, and your antenna is 90% of the battle.
The length of your antenna wire is directly tied to the broadcast frequency. For most projects, a simple quarter-wave monopole antenna is perfect. If you're broadcasting anywhere in the standard 88-108 MHz FM band, a piece of wire around 75 cm (or about 30 inches) long is the ideal starting point. From there, you can experiment by trimming it slightly to see what gives you the clearest sound.
Where you put the antenna matters just as much as its length. Try to keep the wire as straight and vertical as you can. You’ll also notice a huge improvement if you move it away from other electronics, power cables, and big metal objects that can cause interference.
Why You Should Build a Low-Pass Filter
If you want to take your project from a cool experiment to a truly well-behaved transmitter, you need a low-pass filter. Here’s why: when the Pi creates your radio signal, it also unintentionally spits out garbage signals at higher frequencies. These are called harmonics, and they’re the main source of interference that can get unlicensed broadcasters in trouble.
A low-pass filter is a dead-simple circuit that you place between the Pi’s GPIO pin and your antenna. It does exactly what its name implies: it lets your low-frequency FM signal pass through while blocking the higher-frequency harmonics. The result is a much cleaner broadcast.
You can build one yourself with a couple of cheap capacitors and an inductor—it's a great little project if you're new to soldering. By adding this one simple component, you're not just improving your audio quality; you're showing you’re a responsible operator on the airwaves.
Got Questions About Your Pi Transmitter?
Diving into a project like a Raspberry Pi radio transmitter is a blast, but it's totally normal to hit a few snags or wonder what to do next. Whether you're trying to figure out why your signal is weak or just looking for cool new ways to use your creation, let's tackle some of the most common questions that pop up.
"How Far Will This Thing Actually Transmit?"
This is always the first question, and the honest answer is: it depends. With a basic quarter-wave wire antenna—that’s about 75 cm for the FM band—you can realistically expect a solid signal throughout your house and maybe out into the yard. That's really the sweet spot for what this project is designed for.
It's important to remember we're not trying to build a commercial radio station here. The low power output is intentional; it keeps the project on the right side of the law and stops you from accidentally interfering with your neighbors' favorite stations. Things like where you place the antenna, what your walls are made of, and how much other radio "noise" is in your area will all affect your final range.
"Why Does My Audio Sound So Bad?"
If you're getting a lot of static, hiss, or just garbled audio, don't panic. It's almost always something simple. Poor audio quality usually comes down to one of a few usual suspects.
Here’s a quick troubleshooting checklist from my own experience:
- Check Your Power: A Raspberry Pi that isn't getting enough juice will often produce a weak, unstable signal. I can't stress this enough: use a good quality power supply that can reliably deliver 5V at 3A.
- Wiggle the Wire: Is your antenna wire making a solid connection to the GPIO pin? A loose or poorly soldered connection is a super common reason for a bad signal.
- Source Material Matters: The old saying "garbage in, garbage out" is 100% true for radio. If you're broadcasting a low-bitrate MP3, it's going to sound just as fuzzy over the air as it does on your computer.
- Find a Clear Channel: Are you trying to broadcast on a frequency that's right next to a powerhouse local station? You'll lose that battle every time. Spend a few minutes scanning the FM dial to find a truly quiet, empty spot.
Pro Tip: If you're serious about getting a clean signal, consider adding a low-pass filter. It's a simple circuit you can build or buy that cleans up unwanted harmonics. This not only makes your audio sound much clearer but also makes you a better radio citizen by preventing interference.
"Okay, It Works. Now What?"
Beyond just playing a test file, what are some practical, real-world uses for a Raspberry Pi radio transmitter? This is where you can get really creative, especially if you're into smart home automation.
Think about it: you could rig up a whole-home alert system. Instead of a simple phone notification, your Home Assistant server could broadcast a voice message—"Alert: Water leak detected in the laundry room"—to any FM radio in the house. You can then use Dashable to create a beautiful dashboard to control all of these automations.
Another fun idea is synchronized audio for parties or events. Hosting an outdoor movie night? Broadcast the audio to everyone's car stereo, drive-in style. Or for the holidays, you could stream a single Christmas playlist to radios all over the house and yard, keeping the music perfectly in sync everywhere. It transforms a neat little DIY project into a genuinely useful household tool.
Ready to build a sleek, easy-to-use control panel for your new radio transmitter and all your other smart home gadgets? Dashable helps you create beautiful dashboards for Home Assistant without the headache. Check out Dashable to get started.


